We Ran Our Own Tracks on a Real Sand Table: What Matched and What Failed
Notes from one home table: thick grooves, a blurry face, and the settings that fixed it
Key takeaways
- Curve tracks came out in the shape the preview showed, but the grooves were much wider than a thin preview line suggests.
- Later passes erase earlier fine lines, so a long track is mostly remembered by its last passes.
- An image converted with tight settings came out blurry: the outer ring wiggled clearly, but the eyes and mouth of a smiley face were faint.
- Fewer rings, stronger waves and longer waves made the eyes, mouth and outline visible. The result still reads more like a pattern than a drawing.
- This is one table and a few runs, so treat the numbers as a starting point. Try your own in the Sand Table Studio.
By the CymaVis team · Updated
What we tested
The Sand Table Studio turns sound ratios and images into .thr files, the plain text format that sand tables read. A preview on a screen proves little, because a steel ball in real sand behaves differently from a line on a canvas. So we ran the files on a Sisyphus table at home and compared each result with its preview by eye.
We uploaded the files from a PC through the table's local web page. CymaVis is not affiliated with Sisyphus Industries; we mention the name only because that is the table we own.
- Perfect fifth (3 : 2): a short curve, to check that the format and orientation were right.
- Almost π (355 : 113): the longest track in our ready-made set, about two hours on our table.
- The letter F: a simple test to see whether images come out mirrored.
- A smiley face: a harder test, with small features inside a large shape.
Curves: the shape matched, the line did not
The 3 : 2 track came out as previewed, with the small loop at the top, the large curve around it and the ball stopping at the top. So the angle direction in our files was right.
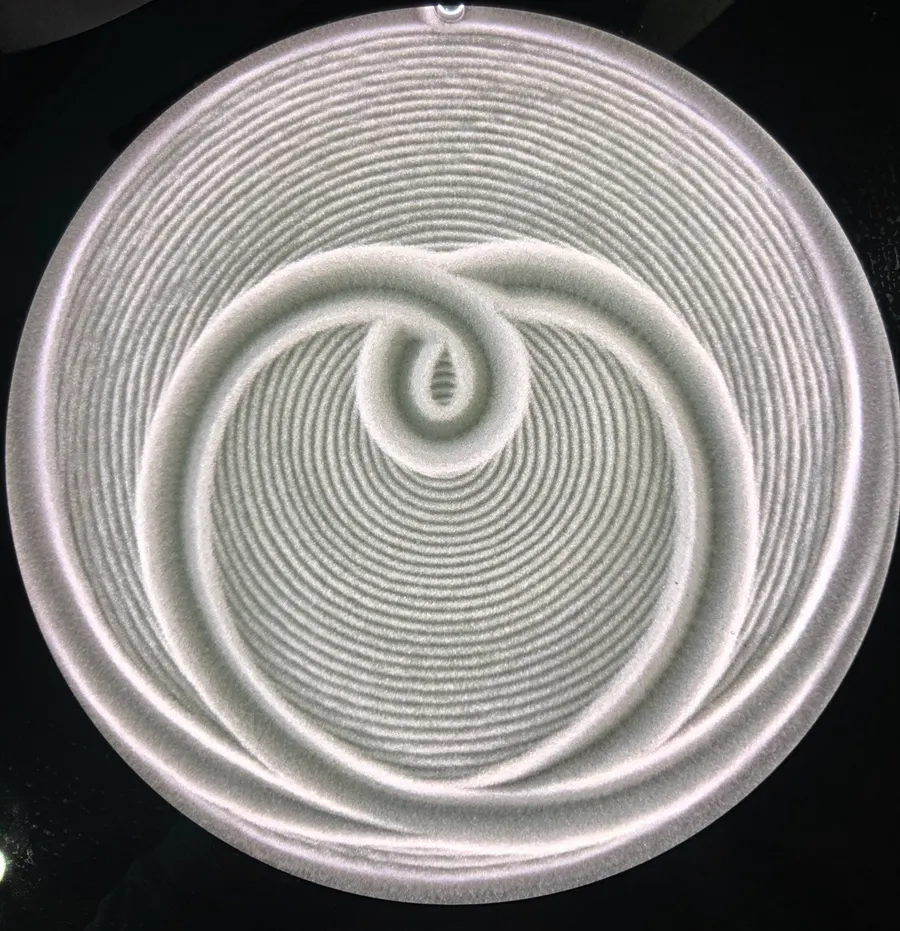
What the first preview got wrong was the line itself. Real grooves are wide, roughly 4% of the table radius judging by eye, with raised sand along both sides. A thin line on a screen looks much more delicate than that. We rebuilt the preview to draw grooves at this width.
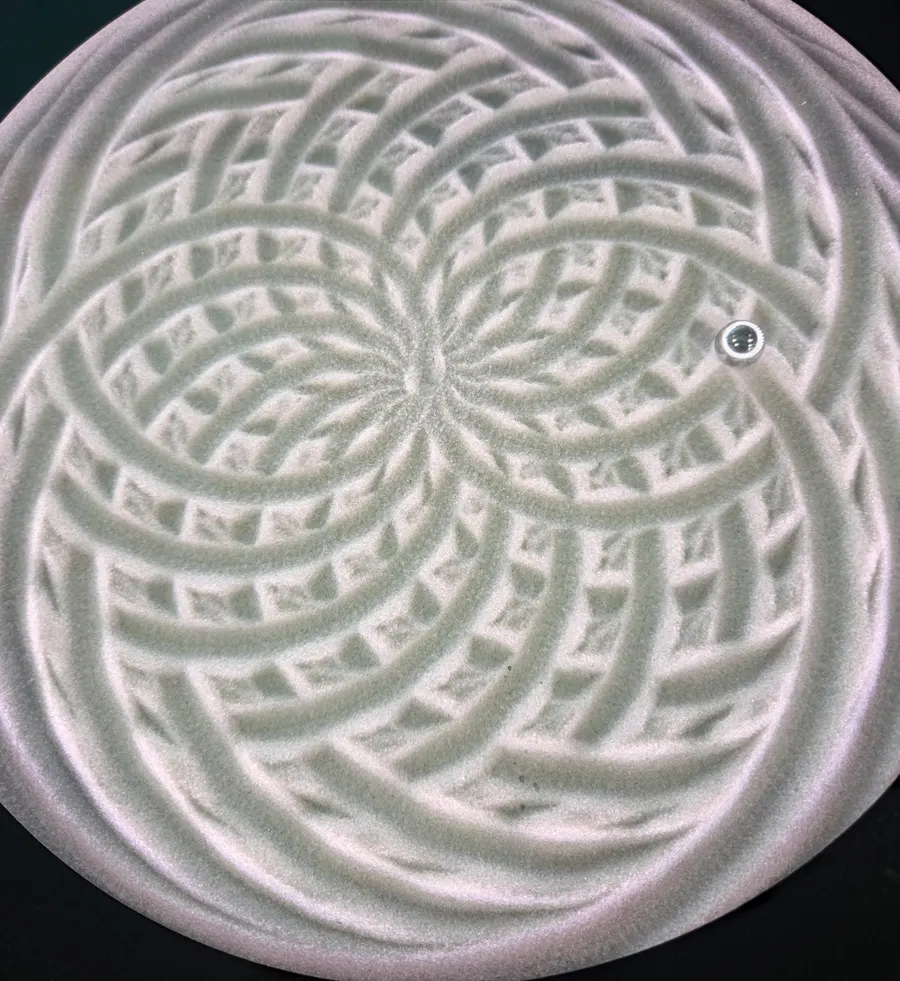
The 355 : 113 run showed a second effect. With 113 turns the ball crosses its own earlier path many times, and each pass pushes aside what was there. Fine lines drawn early disappear, and the last passes form most of what you see. A track can look dense on screen and much simpler in sand.
The previous pattern can stay visible under a short track. On our 3 : 2 run, fine rings from the track before it remained in the background.
Images: the first attempt came out blurry
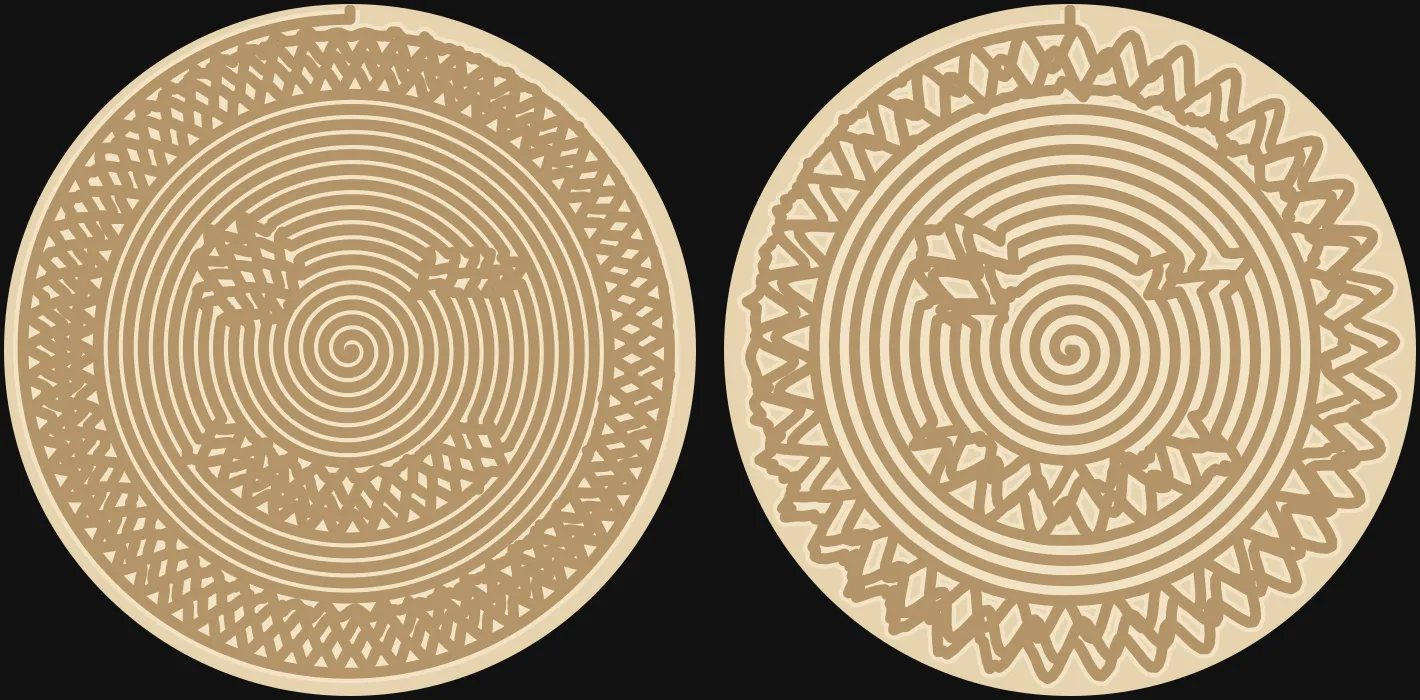
One ball has to draw everything in a single line, so our converter runs a spiral from the center to the edge and makes it wiggle more where the image is dark. Our first settings were 22 rings, a wave length of 0.09 of the radius and a strength of 1.2.

The letter F came out correct and not mirrored, with the stem and both arms in place, though softer than the preview.
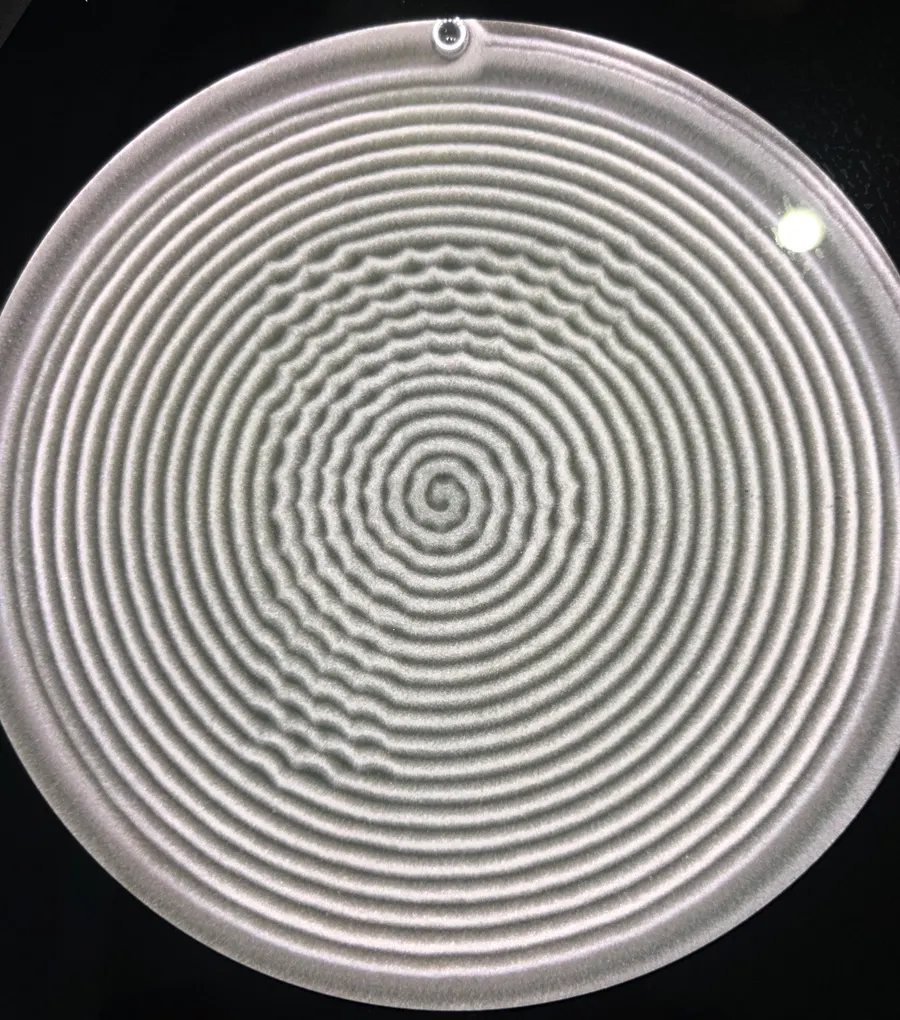
The face was the real problem: the outer ring wiggled clearly, but the eyes and mouth were faint.
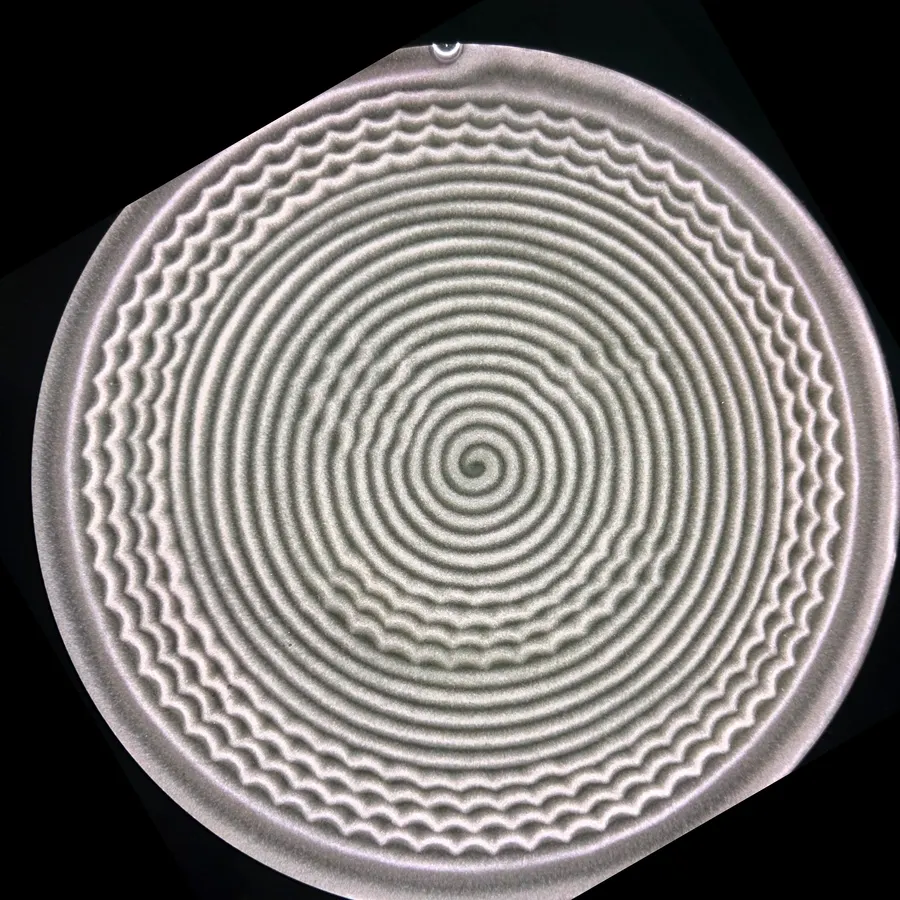
The arithmetic points to a likely reason. Neighboring rings were only about 0.045 of the radius apart, nearly the width of one groove, and the wiggle was only about 0.027 in either direction, smaller than the groove itself. There was little room for a wave to stay visible before the next ring passed beside it.
The settings that made it readable
For the next run we gave the waves more room with all three settings at once.
| Setting | First try | Final |
|---|---|---|
| Rings | 22 | 16 |
| Wave strength | 1.2 | 1.8 |
| Wave length (of radius) | 0.09 | 0.16 |
| Ring spacing (of radius) | about 0.045 | about 0.063 |
| Wiggle each way (of radius) | about 0.027 | about 0.056 |
| Points in the file | about 9,200 | 3,774 |
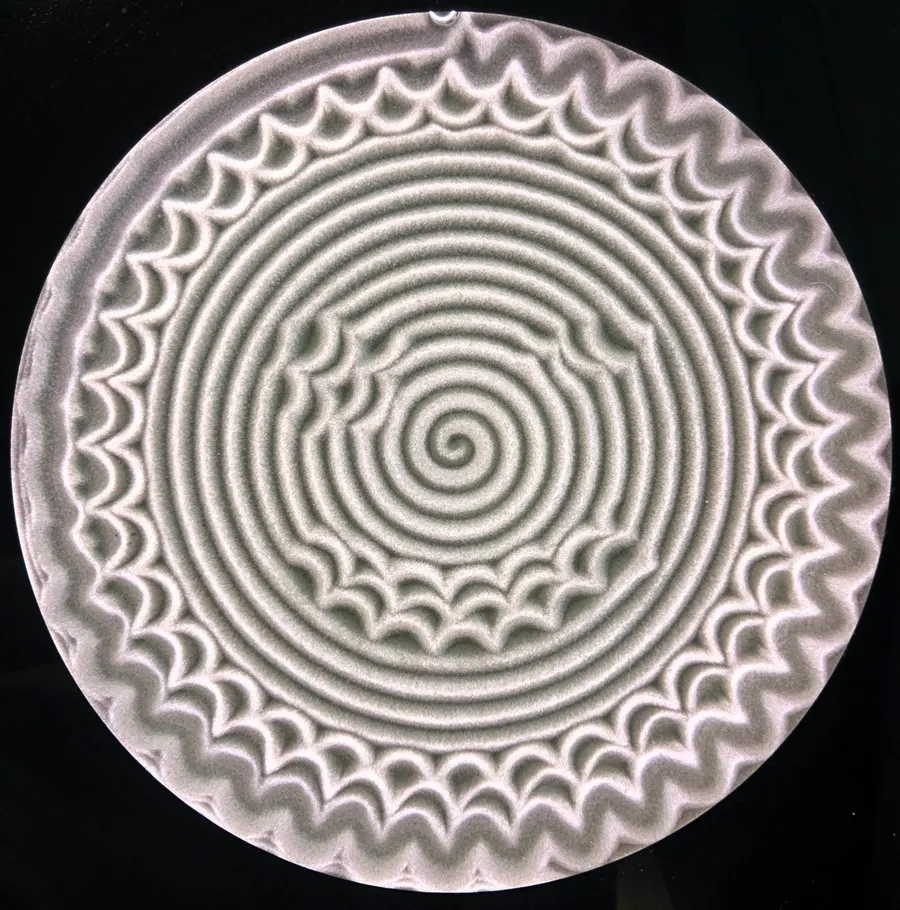
On the table, the second version showed two eyes, a mouth and a strongly scalloped outline. It is still closer to a decorative pattern than a drawing: someone who did not know the source image might not see a face right away. We made these settings the defaults in the Studio and kept the converter labeled as a test.
What this test does not prove
- We changed three things at once. We can say the final combination worked better, but not which change mattered most.
- This is one table. Other tables, sand, ball sizes and speed settings may behave differently.
- We judged by eye. We compared photos with previews and did not measure the grooves.
- Run time is still rough. Our time estimates come from one long track, so short image tracks may differ.
If you want to try an image
- Choose a simple, high-contrast image with a few large shapes. Fine detail and photos will not survive.
- Start with the default settings in the Studio, then lower the rings if the features still look faint.
- Run a short track first to see which way the image sits on your table, and use the Rotate control if it looks turned.
- Clear the previous pattern first if you want a clean result, because old lines can show through.
Frequently asked questions
Why does my sand table pattern look different from the preview?
In our test the main reason was groove width. A real groove is much wider than a thin screen line, and later passes erase fine lines drawn earlier.
Can a sand table draw a photo?
Not in the detail of a photo, at least with our converter. Simple shapes with strong contrast worked best, and even a smiley face came out closer to a pattern than a drawing.
Does a converted image come out mirrored?
Our letter F test did not. It may still look rotated depending on how your table sits or where you stand, and the Studio has a Rotate control for that.
Are these tracks free to use?
Yes. The ready-made tracks and anything you generate in the Studio are free to download.